Are you looking for an intriguing way to bring fresh produce into your home, even without a garden? The humble carrot top, often discarded, holds a secret—it’s a gateway to growing new life, right on your windowsill. This fascinating process, known as regeneration, allows you to cultivate vibrant green foliage and even small new carrots from what would typically be kitchen waste. Far more than just a novelty, regrowing carrots indoors offers a sustainable, educational, and rewarding experience for gardeners of all skill levels. Whether you aim to create a continuous supply of fresh carrot greens for salads and garnishes or simply want to marvel at nature’s resilience, this guide will walk you through every step of transforming those discarded tops into a thriving indoor mini-garden.
The magic of carrot tops – understanding regeneration
Before diving into the practical steps, it’s beneficial to understand *why* a carrot top can regrow. The key lies in what botanists call *meristematic tissue*. This specialized plant tissue, found in areas of active growth like the crown of the carrot (the very top part where the leaves emerge), contains undifferentiated cells. These cells have the remarkable ability to divide and develop into various plant structures—roots, stems, and leaves—given the right conditions. When you place a carrot top in water, you’re essentially activating these dormant cells. The moisture and warmth signal the meristematic tissue to kickstart growth, first by developing tiny feeder roots to absorb water and then by sprouting new green shoots for photosynthesis. This regeneration process is a testament to the plant’s inherent drive to survive and reproduce, even from a seemingly insignificant remnant.
To maximize your chances of success, select a healthy carrot top. Look for carrots that are firm and fresh, with the top still intact and ideally showing a hint of green. Avoid tops that are moldy, mushy, or completely dried out, as their meristematic tissue may be compromised. The size of the carrot top isn’t as critical as its freshness and vitality; even a small disc about an inch thick can work wonders, provided it has a healthy crown.
Setting the stage for growth: gathering your materials
Embarking on your indoor carrot regeneration project requires only a few simple items, most of which you likely already have around the house. Gathering these materials beforehand will ensure a smooth and enjoyable process. First and foremost, you’ll need several *fresh carrot tops*. As discussed, choose healthy, firm ones with a visible crown. The more tops you prepare, the better your chances of success and the more greens you’ll eventually yield.
For the initial water propagation stage, you’ll need shallow dishes or saucers. Small plates, saucers, or even the bottom of a plastic container can work perfectly. The key is that they should be shallow enough to hold a small amount of water without submerging the entire carrot top. You will also need *fresh tap water*, preferably filtered or left out for a day to allow chlorine to dissipate, as this can be harsh on new growth. For the eventual transplantation into soil, prepare small pots or containers with drainage holes. Terra cotta pots, plastic nursery pots, or even repurposed food containers (with holes poked in the bottom) are suitable. Finally, acquire a good quality, well-draining *potting mix*. A standard indoor potting mix enriched with compost will provide the necessary nutrients and aeration for your growing carrots.
The initial water bath: coaxing out roots and greens
This is where the magic truly begins. Once you have your healthy carrot tops and shallow dishes, it’s time to initiate the regeneration process. Place each carrot top cut-side down into a shallow dish. Add just enough water to cover the bottom 1/4 to 1/2 inch of the carrot top. The goal is to keep the cut surface moist to encourage root development without submerging the entire top, which can lead to rot. Position your dishes in a location that receives ample bright, indirect sunlight. A windowsill is ideal, but avoid direct, scorching sun which can dry out the water too quickly or overheat the developing plant.
Maintenance during this phase is crucial. Change the water daily or every other day to prevent mold and bacterial growth, which can quickly doom your efforts. You might notice the water turning slightly cloudy; this is normal as the carrot top releases some sugars and starches. Within a few days, you should start to see tiny white roots emerging from the cut surface, and simultaneously, small green shoots will begin to sprout from the crown. This is an exciting visual confirmation that your efforts are paying off. Continue this water bath until the roots are about 1-2 inches long and the green shoots are robust, typically taking 7-14 days. This root development is vital for the plant’s ability to absorb nutrients once it’s transplanted into soil.
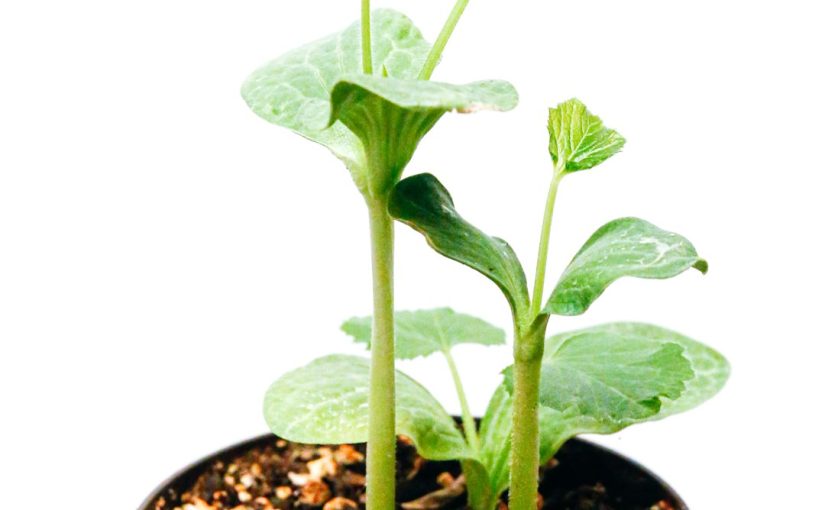
From water to soil: nurturing your indoor carrot patch
Once your carrot tops have developed a healthy network of roots and robust green shoots, they are ready for their permanent home in soil. This transition is critical for their continued growth and potential to form new carrots. Fill your chosen pots with a light, well-draining potting mix. Make a small indentation in the center of the soil and carefully place one rooted carrot top into it, ensuring the roots are spread out gently and the base of the green shoots is just above the soil surface. Gently backfill with soil, lightly firming it around the carrot top to provide stability. Water thoroughly after transplanting until water drains from the bottom of the pot.
Place your potted carrots in a location that receives at least 4-6 hours of bright, indirect light daily. A south-facing window is often best, but supplement with a grow light if natural light is insufficient, especially during winter months. Maintain consistent moisture in the soil, watering when the top inch feels dry to the touch, but avoid overwatering, which can lead to root rot. Your primary harvest from these tops will be the fresh, feathery green foliage, which is excellent for salads, pestos, or as a garnish. While growing full-sized carrots from tops indoors is rare, you might be rewarded with *baby carrots* or small, usable roots if conditions are optimal and the plant thrives. The table below offers a general guide to expected outcomes:
| Growth Stage | Approximate Timeline (from water bath) | Primary Outcome | Secondary Outcome (if optimal) |
|---|---|---|---|
| Root & Green Sprouting | 1-2 weeks | Visible roots and new green shoots | |
| Transplanted Growth (Greens) | 3-6 weeks post-transplant | Abundant carrot greens | |
| Potential Carrot Root Development | 8-12+ weeks post-transplant | More mature greens | Small, harvestable baby carrots |
Regularly trim the green tops to encourage bushier growth and prevent the plant from putting all its energy into bolting (producing flowers and seeds). With consistent care, your indoor carrot tops can provide a continuous supply of fresh, homegrown greens for many weeks, and perhaps even a delightful tiny carrot surprise.
In conclusion, transforming a discarded carrot top into a thriving indoor plant is a truly gratifying experience that marries sustainability with the joy of gardening. From understanding the fascinating science of meristematic tissue to carefully setting up your water bath and finally transplanting to soil, each step in this process offers a unique insight into plant regeneration. You’ve learned how to select the best tops, nurture emerging roots and greens in water, and provide the ideal soil and light conditions for sustained growth. While the primary bounty will often be a continuous supply of fresh, flavorful carrot greens, the occasional surprise of a small new carrot adds an extra layer of reward to this simple project.
This endeavor serves as a wonderful, low-cost way to reduce food waste, educate yourself or your family about plant life cycles, and add a touch of vibrant greenery to your home. It proves that even without a sprawling garden, anyone can cultivate fresh produce and connect with nature’s incredible capacity for renewal. So, next time you’re prepping carrots, don’t discard those tops—give them a new lease on life and watch the magic unfold on your windowsill.
Image by: Suri Huang


