Transforming an ordinary olive tree into a stunning topiary is a rewarding horticultural endeavor that blends artistry with nature. Imagine the timeless elegance of a meticulously sculpted olive tree gracing your patio, garden, or even an indoor space, bringing a touch of Mediterranean charm. This ancient practice, once reserved for grand estates, is now accessible to keen gardeners looking to add a unique focal point to their landscape. Crafting an olive tree topiary requires patience, a keen eye, and a steady hand, but the journey itself is as fulfilling as the final masterpiece. This article will guide you through every essential step, from selecting the perfect olive sapling to the delicate art of precision pruning and ongoing maintenance, ensuring your topiary thrives and becomes a testament to your green thumb.
Choosing the right olive tree and tools
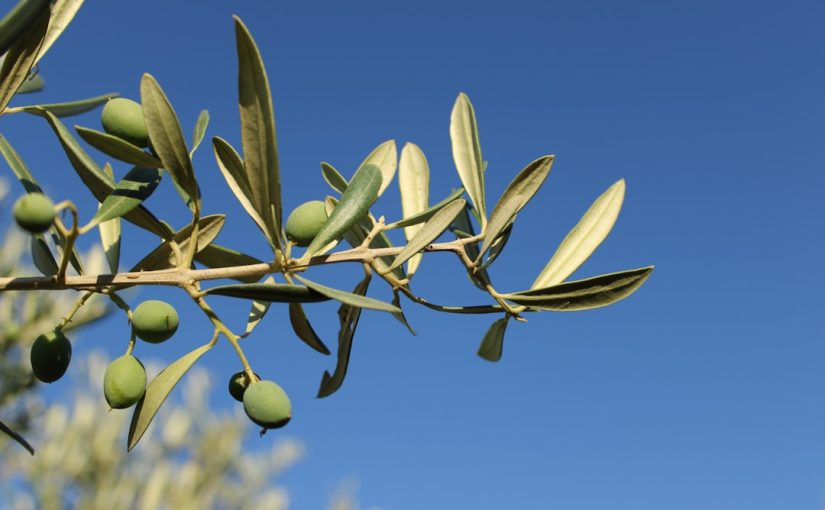
The foundation of any successful topiary begins with selecting the appropriate plant material. For an olive tree topiary, consider younger specimens or dwarf varieties like ‘Arbequina’ or ‘Little Ollie’, which naturally have denser foliage and a more manageable growth habit, making them ideal for shaping. Look for a healthy, vigorous tree with a strong central leader and a balanced distribution of branches. Avoid trees with obvious signs of disease, pests, or stress, as these will hinder your topiary efforts. A robust root system is also crucial, so ensure the tree is not root-bound if purchased from a nursery.
Equally important are your tools. High-quality tools ensure clean cuts and prevent damage to the tree. Essential equipment includes:
- Bypass pruners: For smaller branches and detailed shaping.
- Loppers: For thicker branches, typically up to 1.5 inches in diameter.
- Topiary shears: Specifically designed for fine shaping and maintaining precise forms.
- Hand saw: For any branches exceeding lopper capacity.
- Gardening gloves: To protect your hands.
- Stakes and ties: For initial training and support of the main trunk, especially for standard forms.
Ensure all your tools are clean and sharp before use. Sharp blades make precise cuts that heal quickly, minimizing stress on the tree and reducing the risk of disease.
Understanding topiary forms and initial shaping
Before making your first cut, visualize the desired topiary form. Popular olive tree topiary shapes include classic spheres, elegant cones, multi-tiered pom-poms, or even more intricate animal shapes. For beginners, a simple ball or cone is an excellent starting point. Consider the natural growth habit of your chosen olive tree and how it might lend itself to a particular form. Some common forms and their characteristics are outlined below:
| Topiary Form | Description | Suitability for Olive Tree | Difficulty Level |
|---|---|---|---|
| Standard Ball | Single trunk, spherical canopy | Excellent for younger trees | Moderate |
| Cone/Pyramid | Tapered, conical shape | Good, requires consistent trimming | Moderate |
| Multi-Ball (Pom-Pom) | Multiple spherical tiers | Requires strong branching structure | High |
| Column | Tall, narrow cylindrical shape | Ideal for compact spaces | Moderate |
Begin by removing any dead, diseased, or damaged branches. Next, address any branches that cross or rub against each other, as these can create wounds and inhibit healthy growth. If you’re aiming for a standard form (a single trunk with a shaped head), select the strongest, straightest leader as your main trunk and carefully remove all lower branches and suckers growing from the base. For other forms, focus on creating a foundational structure by evenly distributing the remaining branches. Initial shaping should be conservative; remember, you can always remove more, but you cannot put branches back. Use soft ties to gently guide branches into the desired direction, providing support without girdling the stems.
The art of precision pruning and ongoing care
Precision pruning is where the art of topiary truly comes alive. Once the foundational shape is established, the goal is to refine and maintain it. This requires regular, light pruning rather than infrequent, heavy cuts. Olive trees respond well to pruning, pushing out new growth that contributes to density and allows for shaping. The best time for major pruning is typically in late winter or early spring, just before the active growing season. However, light maintenance pruning can be done throughout the year to keep the shape crisp.
When pruning, aim for symmetrical growth. Step back frequently to assess your progress from different angles. Use your topiary shears for fine detail work, trimming new growth just above a leaf node or an outward-facing bud to encourage branching in the desired direction. For larger growth that deviates significantly from the shape, use bypass pruners. Avoid cutting into old wood unnecessarily, as this can stunt growth in that area. Remember the “little and often” principle; small, frequent trims are far less stressful for the tree and allow for greater control over the final form.
Ongoing care is vital for a healthy topiary. Ensure your olive tree receives adequate sunlight (at least 6-8 hours daily) and is watered consistently, especially during dry periods, allowing the soil to dry out slightly between waterings to prevent root rot. Fertilize sparingly with a balanced, slow-release fertilizer in spring, as excessive fertilization can lead to leggy, uncontrolled growth that is difficult to shape. Monitor for common olive tree pests like scale or whiteflies, and address them promptly to maintain the tree’s vigor and appearance.
Advanced tips and troubleshooting
As your olive tree topiary matures, you may encounter a few challenges. One common issue is uneven growth, where one side grows more vigorously than the other. To correct this, prune the stronger side more frequently and allow the weaker side to catch up. Ensure consistent light exposure, rotating potted topiaries periodically to ensure all sides receive sunlight, which encourages balanced growth. Bare spots can sometimes occur, often due to insufficient light or aggressive pruning. To address this, gently guide nearby branches to cover the area, or encourage new growth by making a heading cut just behind the bare spot, stimulating dormant buds.
For colder climates, winter protection is paramount for outdoor olive topiaries. Bring potted topiaries indoors to a bright, cool location before the first hard frost. For in-ground trees, consider wrapping them with burlap or frost cloth to protect delicate new growth. Always ensure good air circulation to prevent fungal diseases. Troubleshooting common olive tree issues, such as yellowing leaves or leaf drop, often points to watering imbalances (either too much or too little) or nutrient deficiencies. A soil test can help determine if specific nutrients are lacking. Patience is truly a virtue in topiary. It’s a living art form that evolves over time, and minor setbacks are part of the learning process. Enjoy the journey of nurturing your olive tree into a magnificent, sculpted statement piece.
Conclusion
Crafting an olive tree topiary is a deeply satisfying journey that melds the ancient art of horticulture with your personal aesthetic vision. We’ve explored the essential steps, from the critical initial selection of a healthy olive tree and the right tools, through understanding various topiary forms and establishing the foundational shape. We then delved into the nuances of precision pruning, emphasizing the ‘little and often’ approach crucial for maintaining crisp lines and promoting dense foliage, alongside the vital aspects of ongoing care including watering, fertilizing, and pest management. Finally, we touched upon advanced tips and troubleshooting common challenges, offering solutions for uneven growth and winter protection. The beauty of an olive tree topiary lies not just in its final form but in the meditative process of its creation and the continuous care it demands. It’s an evolving artwork, a testament to patience and dedication. Embark on this rewarding endeavor, and watch your olive tree transform into a living sculpture, bringing enduring elegance and a touch of the Mediterranean to your surroundings for years to come.
Image by: Susana Bartolome