The tea tree, scientifically known as Melaleuca alternifolia, is much more than just the source of its famous essential oil. This robust Australian native is a valuable addition to many gardens, offering aesthetic appeal and the potential for a homegrown supply of its beneficial leaves. For those looking to expand their tea tree collection, or simply want to learn the art of plant propagation, understanding how to successfully grow new tea tree plants is a rewarding endeavor. Whether you’re a seasoned gardener or just starting out, propagating tea trees can be a straightforward process when equipped with the right knowledge and techniques. This article will guide you through the various methods, from cuttings to seeds, ensuring you have the tools to cultivate your own thriving tea tree specimens.
Understanding the tea tree and its propagation methods
The tea tree, Melaleuca alternifolia, is a resilient shrub or small tree native to the wetlands of New South Wales, Australia. It thrives in moist, well-drained soils and full sun, and is recognized for its distinctive narrow, aromatic leaves and fluffy white flowers. Beyond its ornamental value, its leaves are renowned for producing the tea tree essential oil, widely used for its antiseptic properties. For the home gardener, propagating tea trees allows for cost-effective expansion of a collection, preservation of specific genetic traits, or simply the joy of nurturing new life.
There are two primary methods for propagating tea trees:
- Cuttings: This asexual method involves taking a section of an existing plant and encouraging it to root. It’s favored for cloning specific plants, ensuring the new plant is genetically identical to the parent. This means if you have a particularly robust or desirable tea tree, propagation via cuttings guarantees the offspring will share those traits.
- Seeds: This sexual method involves germinating seeds produced by the plant. While it can be a slower process and may result in genetic variations (meaning the offspring might not be exactly like the parent due), it can also be a rewarding way to produce many plants and observe natural variation.
Each method has its unique requirements and advantages, making the choice dependent on your goals and resources.
Propagating tea tree from cuttings
Propagating tea tree from cuttings is arguably the most reliable and popular method for home gardeners, as it ensures the new plants are true to type. Here’s a step-by-step guide to success:
Selecting and preparing cuttings
- Timing is key: The best time to take tea tree cuttings is during late spring or early summer, when the plant is actively growing.
- Choose healthy stems: Look for vigorous, non-flowering stems that are semi-hardwood – meaning they are firm but not woody, and still a bit flexible. Avoid overly soft, new growth or old, woody stems.
- Cutting size: Use sharp, sterile pruning shears to take cuttings about 4-6 inches (10-15 cm) long. Make the cut just below a leaf node, as this area contains high concentrations of growth hormones.
- Prepare the cutting: Carefully remove the leaves from the bottom 1-2 inches (2.5-5 cm) of the stem. This prevents rot when planted and exposes the nodes where roots will emerge. Optionally, lightly scrape a small section of bark from the very bottom of the cutting to expose more cambium layer.
- Rooting hormone: While not strictly necessary, dipping the cut end into a powdered or liquid rooting hormone significantly increases the chances of successful rooting and speeds up the process. Tap off any excess hormone.
Rooting medium and environment
The right rooting medium and environment are crucial for encouraging root development.
- Rooting medium: A sterile, well-draining medium is essential to prevent fungal diseases. A mix of equal parts perlite and peat moss, or sand and peat moss, works well. You can also use specialized seed-starting mixes. Fill small pots or trays with the chosen medium.
- Planting the cuttings: Make a small hole in the medium with a pencil or stick. Gently insert the prepared cutting into the hole, ensuring the bottom leaf nodes are buried. Lightly firm the medium around the base of the cutting.
- Humidity and light: High humidity is critical. Cover the pots with a clear plastic dome, a plastic bag supported by stakes, or place them in a propagation tray with a lid. Ensure the plastic doesn’t touch the leaves. Place the cuttings in a warm location with bright, indirect light – direct sun can scorch them. A temperature range of 68-75°F (20-24°C) is ideal.
- Watering: Keep the rooting medium consistently moist, but not waterlogged. Misting the leaves occasionally can also help maintain humidity.
Rooting typically takes 4-8 weeks. You can gently tug on a cutting to check for resistance, indicating root formation. New leaf growth is also a strong sign of success.
Here’s a comparison of common rooting mediums:
| Rooting Medium | Drainage | Moisture Retention | Sterility | Common Uses |
|---|---|---|---|---|
| Perlite | Excellent | Low | High | Improves aeration, often mixed with other mediums |
| Peat Moss | Moderate | Excellent | Moderate | Retains moisture, provides some nutrients |
| Sand (coarse) | Excellent | Low | High | Provides stability and good drainage |
| Coconut Coir | Good | Good | Moderate | Sustainable alternative to peat, good aeration |
Propagating tea tree from seeds
Propagating tea trees from seeds is a rewarding process, though it can be a bit slower than cuttings and may introduce some genetic variability. Tea tree seeds are typically quite small and require specific conditions for successful germination.
Sourcing and preparing seeds
- Seed collection: If you have an existing tea tree, you can collect seeds from mature, dried seed capsules. These are typically small, woody pods that form after the flowers fade. Allow them to dry out completely, then gently crack them open to release the tiny seeds.
- Purchasing seeds: Reputable seed suppliers offer tea tree seeds, often ensuring higher viability.
- Pre-treatment (stratification): Tea tree seeds generally do not require cold stratification. However, some sources suggest a brief soak in warm water for 24 hours prior to sowing to help soften the seed coat and encourage germination.
Sowing and germination
- Sowing medium: Use a fine, well-draining seed-starting mix in shallow trays or pots. A mix of fine sand and peat moss or a commercial seed-raising mix works well.
- Sowing technique: Since tea tree seeds are tiny, it’s best to surface sow them. Sprinkle the seeds thinly over the moistened soil surface. Do not bury them deeply; a very light dusting of fine sand or vermiculite, or simply pressing them gently onto the surface, is sufficient. Some light is often beneficial for germination.
- Environmental conditions:
- Moisture: Keep the medium consistently moist but not waterlogged. Use a spray bottle to water gently to avoid displacing the tiny seeds.
- Temperature: Maintain a warm environment, ideally between 70-75°F (21-24°C). A heat mat can be beneficial.
- Light: Provide bright, indirect light. Placing the trays near a window or under grow lights for 12-16 hours a day is ideal.
- Humidity: Covering the trays with a clear plastic lid or cling film will help maintain high humidity, which is crucial for germination.
- Germination time: Tea tree seeds can take anywhere from 2-6 weeks to germinate, sometimes longer, so patience is key. Once seedlings emerge, gradually increase air circulation by propping open the lid or making small vents to prevent damping-off disease.
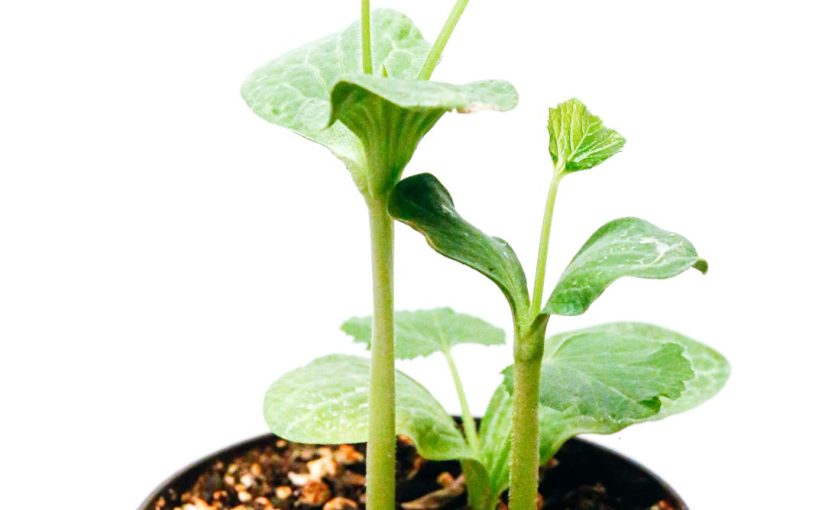
Thinning and transplanting
Once seedlings have developed a few sets of true leaves and are sturdy enough to handle, you can thin them out to prevent overcrowding. Carefully prick out individual seedlings and transplant them into larger individual pots filled with a general potting mix. Be gentle with their delicate root systems.
Essential aftercare for young tea tree plants
Once your tea tree cuttings have rooted or your seedlings have germinated and been transplanted, proper aftercare is crucial to ensure their survival and healthy growth. The transition from a protected propagation environment to a more exposed setting requires careful management.
Watering and humidity
- Consistent moisture: Young tea trees require consistent moisture. The soil should be kept evenly moist but never soggy. Overwatering can lead to root rot, while underwatering can cause stress. Check the soil moisture daily by feeling the top inch of soil; if it feels dry, it’s time to water.
- Reducing humidity: For rooted cuttings or seedlings that were under domes, gradually reduce the humidity over a week or two. Start by opening vents or propping the lid for a few hours each day, slowly increasing the duration until the plants are fully exposed. This process, known as “hardening off,” helps them acclimate to lower humidity levels.
Light and nutrients
- Light requirements: Initially, keep young plants in bright, indirect light. As they mature and become stronger, they can be gradually moved to brighter conditions, eventually acclimating to full sun, which tea trees prefer.
- Fertilization: Young tea trees have delicate root systems, so avoid heavy fertilization. After a few weeks of transplanting, you can begin feeding with a diluted, balanced liquid fertilizer (e.g., half-strength of a 10-10-10 formula) every 2-4 weeks. Once established in their final location, they are not heavy feeders.
Pest and disease management
Keep a close eye on your young tea trees for any signs of pests or diseases. Common issues might include:
- Aphids or spider mites: If detected, a gentle spray of insecticidal soap or neem oil can help control infestations.
- Fungal diseases: Ensure good air circulation to prevent fungal issues like powdery mildew. Avoid overhead watering late in the day, which can leave foliage wet overnight.
Hardening off and transplanting
- Hardening off: Before moving your tea trees outdoors permanently, especially if they’ve been grown indoors or in a greenhouse, they need to be hardened off. This involves gradually exposing them to outdoor conditions over 1-2 weeks. Start by placing them in a sheltered, shady spot for a few hours a day, gradually increasing their exposure to sunlight, wind, and outdoor temperatures.
- Transplanting: Once they have developed a robust root system and are sufficiently hardened off, they can be transplanted to their final location in the garden or into larger pots. Choose a site with full sun and well-draining soil. Dig a hole twice as wide as the root ball and just as deep. Carefully remove the plant from its pot, loosen any circling roots, and place it in the hole. Backfill with soil, gently firming it around the base, and water thoroughly.
With consistent care, your propagated tea trees will grow into healthy, established plants, ready to thrive in their new environment.
Propagating your own tea trees, whether from cuttings or seeds, is a deeply satisfying aspect of gardening that allows you to expand your collection or share these remarkable plants with others. We’ve explored the systematic approach to both methods, from selecting the right material and preparing the ideal rooting environment for cuttings, to the careful sowing and germination requirements for seeds. The journey doesn’t end there; understanding the crucial steps in aftercare – including appropriate watering, lighting, gradual nutrient introduction, and protection against pests – is paramount to ensuring your young tea trees flourish. By adhering to these guidelines, you empower yourself to cultivate robust, healthy tea tree specimens. The effort invested in nurturing these plants from their humble beginnings will undoubtedly yield a lush, rewarding botanical presence in your garden, a testament to your green thumb and the inherent resilience of nature.
Image by: Suri Huang