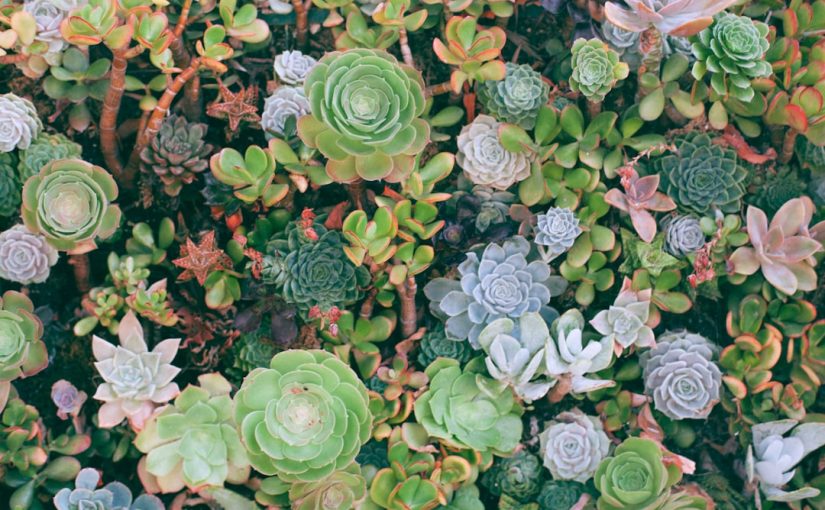
Welcome to the wonderful world of succulent propagation! If you’ve ever admired a friend’s thriving succulent collection and wished you could expand your own without breaking the bank, you’re in luck. Propagating succulents is not only incredibly satisfying, but it’s also surprisingly simple, even for complete beginners. This guide will demystify the process, offering five straightforward methods that will have you creating new succulent babies in no time. Whether you have a single leaf, a stem cutting, or an entire plant ready to be divided, these techniques will empower you to grow your succulent garden with ease. Get ready to transform a small piece into a flourishing new plant, bringing more green beauty into your home.
Getting started with succulent propagation
Before diving into specific methods, understanding a few fundamental principles will significantly boost your success rate. Succulents are incredibly resilient, but they do require certain conditions to thrive during propagation. Firstly, always use clean, sharp tools to make cuts. This minimizes damage to the parent plant and reduces the risk of infection. A pair of sharp scissors or a clean utility knife works perfectly. Secondly, the concept of “callusing” is crucial for many methods. After making a cut, the raw wound needs to dry and form a protective scab, known as a callus. This prevents rot when the cutting is introduced to moisture. This process typically takes anywhere from a few days to a week, depending on the thickness of the cutting and environmental humidity. Lastly, choose the right potting medium. A well-draining succulent or cactus mix is ideal, providing aeration and preventing waterlogging, which can lead to rot before roots can form.
Method 1: propagating from leaves
Propagating succulents from a single leaf is perhaps the most magical and rewarding method for beginners. It requires patience but has a high success rate with many common succulent varieties like Echeveria, Sedum, and Graptopetalum. The key is to select a healthy, plump leaf and remove it carefully from the main stem. You want a clean break, ensuring the entire base of the leaf, including the growth point, remains intact. Gently twist the leaf from side to side until it detaches. Avoid snapping or tearing, as this can damage the growth point and prevent propagation. Once you have your leaves, allow them to callus for 2-5 days in a dry, shaded spot. After callusing, simply lay the leaves on top of a tray filled with well-draining succulent soil. Do not bury them. Place the tray in a bright, indirect light location. After a few weeks, you’ll start to see tiny roots and a miniature plantlet emerging from the base of the leaf. At this point, you can lightly mist the soil every few days to encourage root growth. Once the new plant is established and the mother leaf shrivels, it’s ready for a small pot of its own.
Method 2: propagating from stem cuttings
Stem cuttings are an excellent way to propagate succulents that have become leggy or to multiply varieties like Crassula (Jade), Kalanchoe, or Aeonium. This method often yields faster results than leaf propagation, as the cutting already has a more developed structure. To take a stem cutting, identify a healthy stem section that is at least 2-4 inches long. Using your clean, sharp tool, make a clean cut just below a node (where leaves attach to the stem). Remove any leaves from the bottom inch or two of the cutting to expose the stem. These lower leaves can also be propagated using Method 1! Just like with leaves, it’s crucial to allow the stem cutting to callus. Place the cuttings in a dry, shaded area for 3-7 days, or even longer for thicker stems, until the cut end is completely dry and firm. Once callused, insert the bottom inch of the cutting into well-draining succulent soil. You can use a rooting hormone, though it’s often not necessary for most succulents. Place the potted cutting in a bright, indirect light location and avoid watering for the first week or two. After this initial dry period, water sparingly, allowing the soil to dry out completely between waterings. Roots typically form within 2-4 weeks, and you can gently tug on the cutting to feel for resistance, indicating root development.
Method 3 & 4: propagating from offsets/pups and division
Some succulents naturally produce “pups” or “offsets” – miniature versions of themselves that grow at the base of the mother plant or on stolons. This is common in varieties like Aloe, Haworthia, Agave, and Sempervivum. Separating these offsets is one of the easiest and quickest propagation methods. Simply wait until the pup is a decent size, usually at least an inch or two tall, and ideally has a few roots of its own. Gently twist or cut the offset away from the mother plant, ensuring a clean break. If the offset already has roots, you can plant it directly into its own pot with well-draining soil. If it’s rootless, allow it to callus for a day or two before planting. Water sparingly until established. Division, on the other hand, involves splitting a clumping succulent into multiple smaller plants. This method works well for varieties like Sansevieria or larger clumps of Sempervivum. Carefully unpot the plant and gently pull apart the root ball, ensuring each section has a healthy portion of roots and foliage. You may need to use a clean knife to cut through tougher roots or rhizomes. Plant each division into its own pot, water lightly, and treat it as an established plant, returning to its normal watering schedule once settled.
Method 5: propagating from seeds
While slower and generally more challenging than vegetative propagation, growing succulents from seed can be a deeply rewarding experience, especially for those interested in rare varieties or growing in bulk. This method requires more controlled conditions regarding light, temperature, and moisture. To begin, fill a shallow tray with a sterile, well-draining seed-starting mix. Lightly moisten the mix. Scatter the tiny succulent seeds evenly across the surface of the soil; do not cover them, as most succulent seeds require light to germinate. You can gently press them into the soil to ensure good contact. Cover the tray with a clear dome or plastic wrap to maintain high humidity. Place the tray in a warm location (around 70-80°F or 21-27°C) with bright, indirect light. Germination can take anywhere from a few days to several weeks, or even months, depending on the species. Once seedlings emerge, gradually reduce humidity by propping up the dome. Continue to keep the soil consistently moist but not waterlogged until the seedlings are large enough to be pricked out and transplanted individually, typically when they have developed their second set of true leaves.
| Method | Ease for Beginners | Time to Root | Common Succulent Types |
|---|---|---|---|
| Leaf Propagation | Easy | 3-6 weeks | Echeveria, Sedum, Graptopetalum |
| Stem Cuttings | Easy | 2-4 weeks | Crassula, Kalanchoe, Aeonium |
| Offsets/Pups | Very Easy | 1-3 weeks | Aloe, Haworthia, Agave |
| Division | Easy-Medium | 1-3 weeks | Sempervivum, Sansevieria |
| Seed Propagation | Medium-Hard | Weeks to months | Rare varieties, Lithops, Mesembs |
Embarking on the journey of succulent propagation is a truly satisfying endeavor that allows you to expand your collection, share with friends, and gain a deeper understanding of these fascinating plants. We’ve explored five accessible methods, from the patience-testing but rewarding leaf propagation to the quick wins offered by stem cuttings, offsets, and division, and finally, the meticulous art of growing from seed. Remember the foundational steps: clean tools, proper callusing, and well-draining soil are your allies for success, regardless of the method chosen. Don’t be afraid to experiment and find what works best for your specific succulents and environment. With a little care and observation, you’ll soon be surrounded by a thriving community of new succulent babies, proving that a small effort can yield abundant green rewards. Happy propagating!
Image by: Maria Orlova


