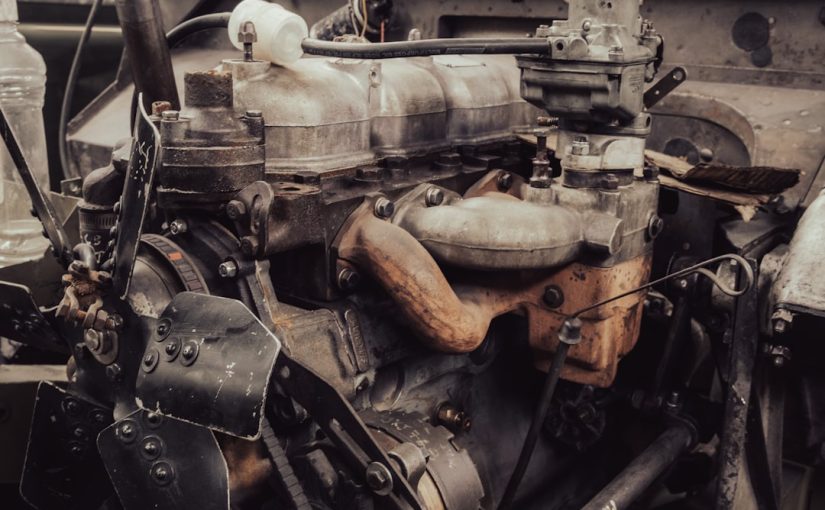
How to Rebuild a Snapper Carburetor
A well-maintained Snapper lawnmower or outdoor power equipment is a valuable asset, but even the most reliable machines can encounter hiccups. One of the most common culprits behind a sputtering engine, hard starting, or poor performance is a fouled or faulty carburetor. Over time, fuel deposits, stale gasoline, or simple wear and tear can compromise this vital component, leading to frustrating operational issues. Rather than investing in a costly replacement, rebuilding your Snapper carburetor offers a cost-effective and rewarding solution. This comprehensive guide will walk you through the precise steps required to restore your carburetor to optimal condition, ensuring your Snapper equipment runs smoothly and efficiently for seasons to come. Get ready to revitalize your engine’s heart with confidence.
Diagnosing the problem and preparing for the rebuild
Before you even think about grabbing a wrench, it’s crucial to confirm that your carburetor is indeed the source of your Snapper’s troubles. Many engine problems can mimic carburetor issues, so a proper diagnosis saves time and effort. Common indicators of a carburetor in distress include:
- Engine cranks but won’t start
- Engine starts but quickly stalls
- Rough idling or surging RPMs
- Engine lacks power or runs poorly under load
- Excessive smoke from the exhaust (can indicate a rich fuel mixture)
- Fuel leaks around the carburetor body
Once you’ve narrowed down the problem to the carburetor, safety must be your top priority. Ensure the engine is cool, the spark plug wire is disconnected to prevent accidental starting, and you are working in a well-ventilated area. Have a fire extinguisher nearby and wear appropriate personal protective equipment, such as safety glasses and gloves.
Gathering the right tools and parts before you begin is essential for a smooth process. You’ll typically need:
- A Snapper carburetor rebuild kit specific to your engine model (check your engine’s model number, usually on the engine shroud)
- Screwdrivers (flathead and Phillips)
- Socket and wrench set
- Pliers
- Carburetor cleaner spray (aerosol)
- Clean rags or shop towels
- Small containers for organizing removed parts
- Compressed air (optional, but highly recommended for clearing passages)
- New fuel filter and fuel line (good practice to replace)
It’s always a good idea to take photos or notes during disassembly, especially if you’re new to carburetor work. This visual aid will be invaluable during reassembly.
The meticulous disassembly and cleaning process
With your diagnosis confirmed and tools ready, it’s time to begin the actual work. Start by draining any fuel from the fuel tank. This prevents spills and ensures a safer working environment. Disconnect the fuel line from the carburetor, often clamped, and cap it off if possible to prevent fuel leaks.
Next, carefully remove the carburetor from the engine. This usually involves detaching the air filter housing, disconnecting the throttle and choke linkages, and unbolting the carburetor from the intake manifold. Be mindful of any gaskets between the carburetor and the engine; these will likely need to be replaced with new ones from your rebuild kit.
Once the carburetor is on your workbench, it’s time for the detailed disassembly. Work methodically and use your small containers to keep track of screws, springs, and tiny components. Common components you’ll encounter include:
- The float bowl: Usually held on by one central bolt. This bowl collects fuel.
- The float: A buoyant component that controls the fuel inlet needle valve.
- The needle valve (or float needle): Sits in a seat and is pushed up by the float to stop fuel flow.
- Main jet and pilot jet: Tiny orifices responsible for fuel delivery at different engine speeds.
- Emulsion tube: Often located under the main jet, mixes air and fuel.
- Idle mixture screw and idle speed screw: External adjustment screws.
- Diaphragm and gasket (on some carburetor types): Regulate fuel flow using engine vacuum.
As you remove each part, inspect it for wear or damage. Pay close attention to the jets and tiny fuel passages. Many carburetor issues stem from these passages becoming clogged with varnish or debris. Generously spray all metal parts with carburetor cleaner, letting them soak if necessary. Use the thin straw attachment on your cleaner to direct the spray into every tiny hole and passage. For stubborn clogs, a thin piece of wire (from a wire brush, but be careful not to enlarge orifices) or compressed air can be effective. Never use harsh metal tools that could scratch or deform the precision-machined surfaces. The goal is to ensure every passage is completely clear and free of obstructions. Ensure the float bowl is spotless, as any remaining residue can quickly clog your newly cleaned jets.
Here’s a quick reference for common components and their roles:
| Component | Primary Function | Common Issues |
|---|---|---|
| Float | Regulates fuel level in bowl | Sinks, sticks, causes flooding/starvation |
| Needle Valve | Seals fuel inlet to float bowl | Worn tip, sticks open/closed, causes leaks/no fuel |
| Main Jet | Controls fuel flow at high speeds | Clogged, causes lack of power/stalling |
| Pilot Jet (Idle Jet) | Controls fuel flow at idle/low speeds | Clogged, causes rough idle/stalling at low RPM |
| Diaphragm | Pumps fuel via engine vacuum (on certain types) | Cracked, stiff, causes no start/poor running |
Reassembly, component replacement, and fine-tuning
With every component thoroughly cleaned and inspected, it’s time for the reassembly using your Snapper carburetor rebuild kit. The kit will contain new gaskets, O-rings, a new needle valve, and sometimes a new float or jets. These new parts are crucial for a successful rebuild, as old gaskets can leak and worn needle valves will not seal properly.
Begin by replacing the needle valve and its seat (if supplied in the kit). Ensure the float pivots freely without binding. Set the float height according to your Snapper service manual specifications – this is a critical adjustment that directly impacts fuel delivery. A float too high will cause flooding; too low will cause fuel starvation. Use a ruler or a specific float gauge if available.
Install the new main jet, pilot jet, and emulsion tube carefully, tightening them to snug but not overtight specifications. Replace all old gaskets and O-rings with the new ones from the kit. Pay close attention to the orientation of gaskets and diaphragms if your carburetor uses them, as improper installation can prevent proper function. Secure the float bowl with its new gasket.
Once the carburetor is fully reassembled, carefully reattach it to the engine, ensuring new gaskets are used between the carburetor and the intake manifold. Reconnect the throttle and choke linkages, making sure they move freely and operate the carburetor’s butterflies correctly. Attach the fuel line, preferably with a new fuel filter, to ensure clean fuel reaches your newly rebuilt carburetor.
Before attempting to start the engine, prime the carburetor by ensuring fuel flows into the bowl. Start the engine and allow it to warm up. Initially, it might run a bit rough. You’ll need to adjust the idle speed and possibly the idle mixture screw. The idle speed screw typically adjusts how far the throttle plate opens at rest, while the idle mixture screw fine-tunes the air-fuel ratio at idle. A common starting point for the mixture screw is 1.5 turns out from gently seated. Turn it slowly, listening for the highest, smoothest idle, then back it off slightly to avoid a lean condition. Test the engine under load to ensure it performs as expected across its RPM range. A properly rebuilt and adjusted carburetor will make your Snapper equipment run like new.
Conclusion
Rebuilding a Snapper carburetor might seem like a daunting task at first, but by following a methodical approach, it’s a highly achievable and deeply satisfying DIY project. We’ve covered the essential steps, from accurately diagnosing the tell-tale signs of a failing carburetor to the meticulous process of disassembly, thorough cleaning, and careful reassembly with new components. Understanding the role of each tiny part, paying close attention to detail during the cleaning phase, and making the necessary adjustments are key to a successful outcome. Not only does rebuilding save you money compared to purchasing a new carburetor, but it also gives you a deeper understanding and appreciation for your Snapper equipment’s mechanics. By restoring this crucial component, you’re ensuring reliable starts, smooth operation, and optimal performance, extending the lifespan of your valuable machinery. Embrace the satisfaction of bringing your Snapper back to peak condition, ready to tackle any outdoor task with renewed vigor and efficiency.
Image by: Jaime Maldonado


