The tamarind tree, Tamarindus indica, is a magnificent tropical plant renowned for its delicious, tangy pods. From savory chutneys and refreshing beverages to essential ingredients in diverse cuisines worldwide, the tamarind fruit offers a unique flavor profile that is truly irreplaceable. While you can often find tamarind pulp in stores, there’s a profound satisfaction in cultivating your own tree from seed. It’s a journey that connects you directly to nature’s cycle, offering a rewarding experience as you witness a tiny seed transform into a vibrant seedling. This guide will walk you through the precise steps required to successfully germinate tamarind seeds, ensuring you lay a strong foundation for a thriving tamarind tree.
Selecting and preparing your tamarind seeds
The first crucial step in germinating tamarind seeds is proper selection and preparation. The quality of your seed significantly impacts your success rate. Ideally, procure seeds from fresh, ripe tamarind pods. If using dried seeds, ensure they haven’t been treated with chemicals or subjected to extreme heat, which can damage their viability. Once you have your seeds, thoroughly clean them to remove any residual pulp or fibers. This prevents fungal growth and insect attraction.
Tamarind seeds possess a very hard outer coat, a natural protective mechanism that inhibits water absorption and thus, germination. To overcome this dormancy, a process called scarification is necessary. There are several effective methods:
- Mechanical scarification: Carefully nick the seed coat with a sharp knife or use sandpaper (fine-grit) to gently abrade a small section. The goal is to create a tiny opening or thin the coat, allowing water to penetrate without damaging the embryo inside. Be cautious not to cut too deeply.
- Hot water treatment: Place the seeds in a bowl and pour hot (but not boiling) water over them. Let them soak as the water cools to room temperature, usually overnight or for 24 hours. This method helps soften the seed coat naturally.
After scarification, examine your seeds. They should appear slightly plump, indicating they’ve begun to absorb moisture. Discard any seeds that float, as these are often not viable.
The soaking and planting process
Following scarification, soaking your tamarind seeds is critical. Place the scarified seeds in a container of lukewarm water for 24 to 48 hours. Change the water every 12 hours to prevent bacterial growth. This extended soak will further hydrate the seed, signaling it’s time to break dormancy and sprout. You might even observe some seeds beginning to swell noticeably.
Once soaked, it’s time for planting. Choose a well-draining potting mix; a good blend would include equal parts coco coir or peat moss, perlite, and a sterile seed-starting mix. Avoid heavy garden soil, which can retain too much moisture and lead to rot. Select individual small pots (3-4 inches in diameter) with drainage holes, or a seed tray with compartments. Plant each seed approximately 1 inch deep, covering it lightly with the potting mix. After planting, gently water the soil until it is evenly moist but not waterlogged. The aim is to create a consistently damp environment without suffocating the developing embryo.
Creating the ideal germination environment
Tamarind seeds thrive in warm, consistent conditions reminiscent of their tropical origin. The ideal temperature range for germination is between 75°F and 85°F (24°C-29°C). If your indoor environment is cooler, consider using a propagation mat placed under your seed trays to provide bottom heat. This warmth is crucial for activating the enzymes within the seed that initiate growth.
While light is not essential for the initial germination phase (as seeds sprout in darkness underground), consistent humidity is. To maintain high humidity around the seeds, cover your pots or trays with a clear plastic dome or cling film. This creates a miniature greenhouse effect, trapping moisture and warmth. Ensure you lift the cover daily for a few minutes to allow for air circulation, which helps prevent fungal issues like damping-off. Once the first shoots emerge, move them to a location with bright, indirect light. Direct, intense sunlight can be too harsh for tender seedlings.
| Parameter | Recommended Value | Notes |
|---|---|---|
| Ambient Temperature | 75-85°F (24-29°C) | Crucial for successful germination. |
| Soil pH | 6.0-7.0 | Slightly acidic to neutral. |
| Humidity | 70-80% | Use a humidity dome or plastic wrap. |
| Germination Time | 1-4 weeks | Can vary based on seed quality and preparation. |
Nurturing your tamarind seedlings
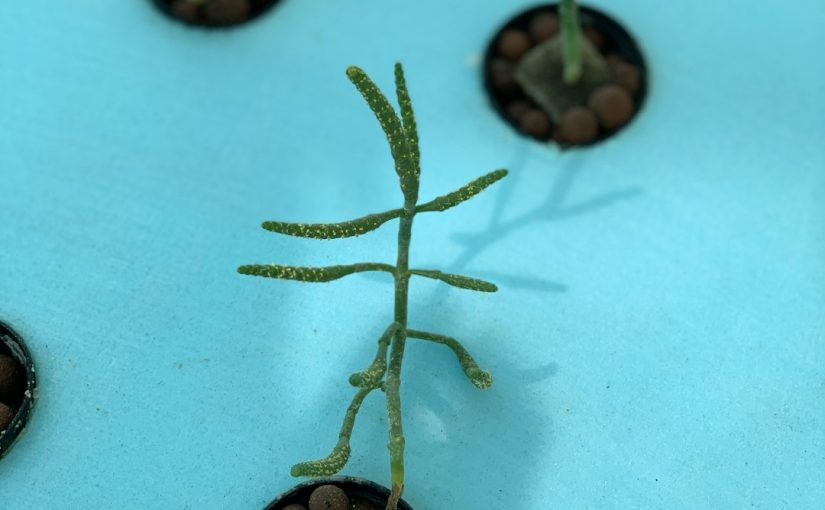
Patience is a virtue when waiting for tamarind seeds to germinate. Sprouts can appear anywhere from one to four weeks, sometimes even longer, depending on the seed’s viability and environmental conditions. Once your seedlings emerge, continue to maintain consistent moisture in the soil, allowing the top layer to dry slightly between waterings to prevent overwatering. Reduce the frequency of misting if you were doing so, but still keep humidity moderately high until the seedlings are more established.
As the seedlings develop their first set of true leaves (the second set of leaves to appear, distinct from the initial cotyledons), they will begin to require more nutrients. At this stage, you can introduce a very diluted, balanced liquid fertilizer, perhaps at half or quarter strength of the recommended dosage. Be vigilant for common seedling issues such as damping-off, a fungal disease that causes young stems to rot at the soil line. This is often a result of overwatering or poor air circulation. Ensure good airflow and proper drainage to mitigate this risk. Once your seedlings are robust enough, typically when they reach 4-6 inches in height, they can be carefully transplanted into larger pots, preparing them for continued growth.
Germinating tamarind seeds is a rewarding endeavor that connects you with the plant’s life cycle from the very beginning. We’ve explored the essential steps, starting with the careful selection and scarification of your seeds to break their natural dormancy. From there, the crucial soaking process prepares them for planting in a well-draining, sterile potting mix, ensuring proper anchorage and moisture. Maintaining an ideal germination environment—characterized by consistent warmth and high humidity—is paramount for encouraging successful sprouting. Finally, nurturing your young seedlings with appropriate watering, light, and protection from common issues will pave the way for healthy growth. While it requires a degree of patience, following these detailed steps will significantly increase your chances of witnessing the emergence of your very own tamarind tree, a delightful addition to any garden or a unique indoor plant for those in cooler climates.
Image by: Suvrajit 💭 S


