Welcome, aspiring mycologists and culinary adventurers! Have you ever dreamt of plucking fresh, gourmet mushrooms right from your countertop? It sounds like something out of a fairy tale, but with the magic of mushroom growing kits, it’s a surprisingly simple reality for beginners. Forget the complexities of traditional gardening; these kits provide an almost foolproof entry into the fascinating world of fungi cultivation. We’re about to embark on a delightful journey, exploring how these kits demystify the art of mushroom growing, transforming you from a curious novice into a proud cultivator. Get ready to discover the joy, ease, and delicious rewards of bringing your own edible fungi to life, all without needing a green thumb or a vast garden.
Unlocking the magic: why kits are a beginner’s best friend
Diving into the world of growing your own food can often feel daunting, especially when it comes to something as unique as mushrooms. This is precisely where mushroom growing kits shine, acting as your personal guide and accelerator. They take the guesswork out of the initial, most challenging stages of mycology. Unlike starting from spores or grain spawn, which requires sterile conditions and a deep understanding of fungal life cycles, kits arrive pre-inoculated. This means the mushroom “seed” (mycelium) is already happily colonizing a nutrient-rich block of substrate, patiently waiting for the right conditions to burst forth as delicious fruiting bodies.
The beauty of these kits lies in their simplicity and immediate gratification. Most kits promise a harvest within 7-14 days of activation, a timeline that makes traditional gardening look like an eternity. This rapid turnaround provides an incredible sense of accomplishment and encourages continued exploration. Furthermore, they are incredibly space-efficient, fitting comfortably on a kitchen counter or a small shelf, making them ideal for urban dwellers or anyone with limited outdoor space. Beyond the convenience, growing your own mushrooms offers unparalleled freshness and flavor that store-bought varieties simply can’t match, elevating your home cooking to new heights.
Selecting your fungi friend: choosing the perfect kit
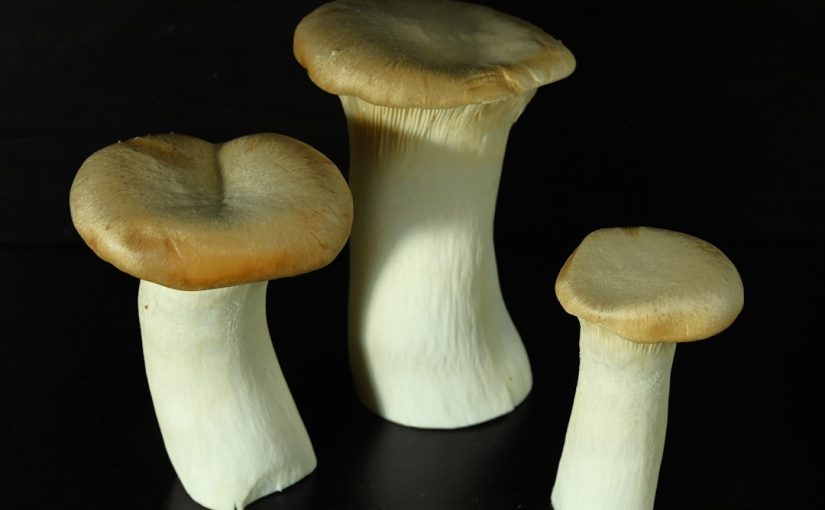
With a growing variety of mushroom kits available, choosing your first fungi friend can be an exciting decision. While many kits are beginner-friendly, some varieties are more robust and forgiving than others. Oyster mushrooms, for example, are often recommended for first-timers due to their aggressive growth, fast fruiting, and ability to produce multiple “flushes” (harvests). Their versatile flavor makes them a kitchen staple. Lion’s Mane mushrooms offer a unique, almost seafood-like flavor and a striking appearance, though they might require a touch more patience. Shiitake mushrooms are another popular choice, known for their earthy flavor and meaty texture, but can sometimes take a bit longer to fruit.
When selecting a kit, you’ll generally find a pre-colonized block of substrate (often sawdust, straw, or grain), sometimes a humidity tent or bag, and detailed instructions. Look for reputable brands that clearly state the mushroom variety and provide comprehensive guides. Consider the ideal temperature range for your chosen mushroom and ensure it aligns with your home environment. While most kits are designed for ambient room temperatures, extreme fluctuations can hinder growth. Here’s a brief comparison of some popular beginner-friendly options:
| Mushroom Type | Difficulty Level | Typical Growth Time (First Flush) | Flavor Profile |
|---|---|---|---|
| Oyster (Pearl, Pink, Grey) | Very Easy | 7-10 days | Mild, subtly sweet, earthy |
| Lion’s Mane | Easy to Moderate | 10-14 days | Mild, sweet, crab or lobster-like |
| Shiitake | Moderate | 14-21 days | Earthy, umami, meaty |
| Reishi (for tea) | Easy | 14-30 days | Bitter, woody (not typically eaten fresh) |
From box to bounty: the simple steps to cultivation
Once you’ve chosen your kit, the real fun begins! The process is surprisingly straightforward, typically involving just a few key steps. First, you’ll need to “activate” your kit. This usually involves cutting a slit or removing a section of the plastic bag around the substrate block. For some kits, a short cold soak in water might be recommended to shock the mycelium into fruiting, mimicking natural temperature drops that signal it’s time to produce mushrooms. Always follow your specific kit’s instructions carefully.
Next, creating the right environment is crucial. Mushrooms thrive on humidity. Most kits come with a small humidity tent or bag that helps maintain the necessary moisture levels around the block. You’ll typically need to mist the exposed part of the block and the inside of the humidity tent with a spray bottle, often once or twice a day, using clean, filtered water. Place your kit in a spot with indirect light – bright light isn’t necessary, but some ambient light helps guide growth. Avoid direct sunlight, which can dry out the block too quickly. Maintain a stable room temperature, ideally between 60-75°F (15-24°C), depending on the mushroom variety. Within a week or two, you’ll start to see tiny pins forming, which will rapidly develop into full-sized mushrooms ready for harvest. To harvest, gently twist and pull the mushrooms from the block, or cut them at the base with a clean knife, ensuring you don’t damage the block for future flushes.
Troubleshooting common beginner blips and triumphs
While mushroom growing kits are designed for ease, every beginner might encounter a minor hiccup or two. Don’t be discouraged if your kit doesn’t immediately spring to life! The most common issue is insufficient humidity. If you see no signs of growth after a week, increase your misting frequency or ensure your humidity tent is properly sealed. Another common concern is temperature; if your environment is too cold or too hot, it can stall the mycelium. Try to find a more stable spot for your kit. Sometimes, insufficient air exchange can also be a factor; a gentle fanning once a day can help by introducing fresh air, which mushrooms need to “breathe” and signal fruiting.
Distinguishing between beneficial mycelium and unwanted mold is another common worry. Healthy mycelium is typically pure white, often looking like dense cotton or delicate white fuzz. Contamination, usually mold, will appear in distinct colors like green, black, or blue, and often has a powdery or slimy texture. If you spot colored mold, it’s best to safely discard the kit to prevent spores from spreading to other areas. Most kits are fairly resistant to contamination if kept clean. After your first harvest, you can often get a second or even third “flush” by re-soaking the block and repeating the misting process, though subsequent flushes will yield fewer mushrooms. Celebrate each harvest, learn from any minor setbacks, and enjoy the delicious rewards of your burgeoning mycological skills!
Embarking on the journey of growing your own mushrooms with a beginner kit is a truly rewarding experience, transforming a simple box into a living source of fresh, gourmet delights. We’ve explored how these kits streamline the cultivation process, making it accessible to anyone, regardless of their gardening expertise. From selecting the perfect mushroom variety like easy-to-grow oysters or unique lion’s mane, to the straightforward steps of activation, misting, and harvesting, the path to a homegrown bounty is clear and enjoyable. Even with minor troubleshooting along the way, the satisfaction of nurturing fungi from pin to plate is immense. So, embrace the fun, experiment with different kits, and savor the exceptional flavor and freshness that only your very own cultivated mushrooms can provide. This isn’t just about growing food; it’s about fostering a deeper connection with nature and discovering a new, delicious hobby that brings joy to your kitchen and your palate.
Image by: Gennady Zakharin


