The journey from a sterile agar plate to a bountiful harvest of gourmet mushrooms is a captivating one, but it hinges on a critical component: the fruiting chamber. Often overlooked by beginners, this specialized environment is where your colonized substrate truly comes to life, mimicking the precise conditions mushrooms require to fruit successfully. Without a properly designed and managed fruiting chamber, your efforts in inoculation and colonization might lead to disappointing results. This guide will delve into the science and practicality behind creating an optimal habitat for your fungal friends, ensuring high humidity, fresh air exchange, and the right light and temperature conditions necessary for robust yields. Get ready to transform your mycelium into magnificent mushrooms.
The vital role of a mushroom fruiting chamber
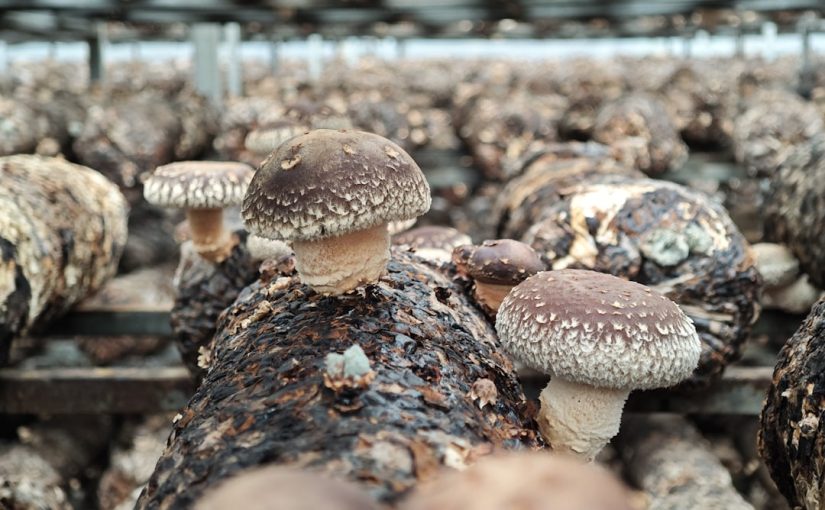
Once your mushroom substrate is fully colonized by mycelium, it’s ready to transition into the fruiting phase. This stage requires a significant shift in environmental conditions from the colonization phase. A fruiting chamber is essentially a microclimate designed to trick the mycelium into thinking it’s time to reproduce, leading to the formation of mushroom pins and their subsequent growth into mature fruits. Its primary purpose is to provide an environment that is drastically different from the sterile, high-CO2 conditions needed for initial colonization.
The absence of a dedicated fruiting chamber often results in stunted growth, malformed mushrooms, or even no fruiting at all. Mycelium needs specific triggers to initiate pinning, and these triggers are largely environmental. A well-designed chamber creates a stable, consistent habitat, protecting the delicate developing mushrooms from drying out and providing the necessary atmospheric cues for optimal development.
Key environmental factors and their control
To successfully fruit mushrooms, four primary environmental factors must be meticulously controlled within your chamber:
- Humidity: Mushrooms are composed of up to 90% water, and they require extremely high humidity to prevent evaporation from their delicate surfaces. Relative humidity levels between 90-95% are often ideal, though this can vary by species.
- Control methods:
- Perlite: A layer of wet perlite at the bottom of the chamber acts as a humidity reservoir.
- Misting: Regular manual misting of the chamber walls (not directly onto the mushrooms) with a fine spray bottle.
- Ultrasonic foggers: Automated foggers connected to a humidity controller can provide consistent high humidity.
- Fresh air exchange (FAE): While colonization thrives on CO2, fruiting mushrooms need oxygen and low CO2 levels. High CO2 can lead to “fuzzy feet” (mycelial growth on the base of the stems) and elongated, spindly fruits.
- Control methods:
- Passive holes: Strategically placed holes (e.g., a “Shotgun Fruiting Chamber” design) allow for natural convection.
- Fanning: Manually fanning the chamber several times a day to replace stale air.
- Small fans: Automated fans on timers can provide consistent FAE.
- Light: While not a primary energy source for fungi (they don’t photosynthesize), indirect light acts as a directional cue for pinhead formation and proper cap development.
- Control methods:
- Ambient room light: A nearby window or a small LED light is usually sufficient. Avoid direct sunlight which can cause overheating and drying.
- Temperature: Each mushroom species has an ideal fruiting temperature range. Maintaining this range is crucial for successful pinning and growth.
- Control methods:
- Room temperature: Often, ambient room temperature is adequate.
- Heating pads: Can be used in cooler climates, placed *underneath* the chamber, never directly contacting the container, to maintain a slightly elevated temperature.
Building your own simple fruiting chamber (monotub method)
The “monotub” is a popular and effective DIY fruiting chamber, perfect for beginners due to its simplicity and effectiveness. Here’s a step-by-step guide:
- Materials needed:
- Clear plastic storage tub with a lid (e.g., 50-70 quart capacity)
- Power drill with various sized drill bits (1/4 inch, 1/2 inch, 1 inch, 2 inch)
- Perlite (coarse grade, available at garden stores)
- Duct tape or micropore tape
- Spray bottle
- Drilling holes for FAE:
Using a 1/2 inch or 1 inch drill bit, drill holes around the tub. A common configuration for a 50-quart tub is:
Location Number of holes Height from bottom Long sides 4 per side 2 inches Short sides 2 per side 2 inches Long sides 4 per side Just below lid Short sides 2 per side Just below lid Ensure holes are evenly spaced. The lower holes provide fresh air, and the upper holes allow CO2 to escape.
- Prepare the perlite layer:
Thoroughly rinse your perlite to remove dust. Hydrate it by soaking it in water, then drain any excess water until it’s damp but not waterlogged. Spread a 3-4 inch layer of wet perlite evenly across the bottom of the tub.
- Introduce your colonized substrate:
Place your fully colonized substrate block (e.g., a mushroom cake or bulk substrate in a tray) directly on top of the perlite layer. Ensure it has some space around it for air circulation.
- Initial setup and maintenance:
Mist the inside walls of the tub and the perlite (avoiding direct misting of the substrate itself) until small water droplets are visible. Snap the lid onto the tub. Place the tub in an area with ambient light, avoiding direct sunlight. You will typically need to mist the walls 2-3 times a day and fan the tub by fanning the lid or gently waving a piece of cardboard over the holes for 30-60 seconds, 3-4 times a day, to ensure adequate FAE.
Scaling up and automating your fruiting environment
For those looking to grow more mushrooms or minimize daily manual intervention, scaling up and automating your fruiting chamber offers significant advantages in consistency and yield. Larger setups like Martha tents are a popular choice. These are essentially small, zippered greenhouses, often used for plants, which can be easily adapted for mushroom cultivation.
Automation primarily focuses on maintaining precise humidity and FAE without constant manual oversight. This involves:
- Humidity control: Installing an ultrasonic fogger or humidifier inside the tent, connected to a digital humidity controller. You set your desired humidity level, and the controller activates the fogger when the humidity drops below the set point.
- Fresh air exchange: Integrating small computer fans (often 120mm fans) or inline duct fans. One fan can be set to pull fresh air in, and another to exhaust stale air out. These fans are typically connected to a smart plug or a simple timer, set to run for short bursts (e.g., 15 minutes every 3-4 hours) throughout the day.
- Lighting: A simple LED strip light on a timer can provide consistent light cycles (e.g., 12 hours on, 12 hours off) without the need for manual switching.
- Temperature control: While room temperature is often sufficient, a small space heater with a thermostat or a seedling heat mat (for smaller chambers) can be used to maintain specific temperature ranges, especially for species requiring warmer conditions.
These automated systems allow for a “set it and forget it” approach for longer periods, freeing up your time and often leading to more consistent flushes of mushrooms due to the stable environment they create.
Building a successful mushroom fruiting chamber is the cornerstone of a rewarding cultivation experience, transforming your colonized substrate into a vibrant harvest. We’ve explored why these specialized environments are crucial, detailing the interplay of humidity, fresh air exchange, light, and temperature that mimics nature’s cues for fungi to fruit. From the simplicity of a DIY monotub, ideal for beginners, to the more sophisticated and automated Martha tents designed for larger yields and convenience, the principles remain consistent: provide the right conditions, and your mycelium will respond bountifully. Mastering these environmental controls ensures not just the appearance of mushrooms, but their healthy and robust development. With the knowledge and tools outlined, you are well-equipped to create the perfect home for your fruiting fungi, leading to consistent flushes and the satisfaction of growing your own gourmet or medicinal mushrooms.
Image by: yao oo


