Growing a peach tree from a seed is a rewarding, budget-friendly project that lets you watch a tiny seed transform into a fruit-bearing tree over time. While it takes patience (peach trees grown from seed take 3–5 years to produce fruit), the process is simple and requires only basic supplies. Plus, you’ll get a unique tree—each seed grows a slightly different variety, adding character to your garden. Below is a detailed guide to help you successfully grow a peach tree from seed.
1. Gather Supplies (Mostly From Your Kitchen!)
You won’t need specialized tools—most items are easy to find at home or a local garden center. Here’s what you’ll need:
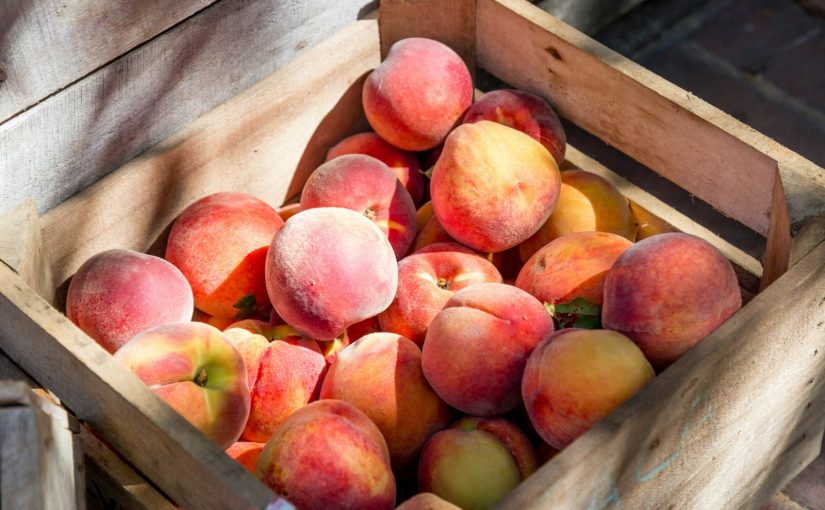
a. Peach Seeds (Free—From Fresh Peaches!)
- Choose ripe, organic peaches (non-organic peaches may have been treated with chemicals that inhibit seed growth). Eat the peach and save the pit—this is where the seed is hidden.
- Collect 3–5 pits (not just one!)—some seeds may be non-viable (unable to grow), so having extras increases your chances of success.
b. Basic Tools (Free or Cheap)
- A small hammer or nutcracker (to crack open the hard pit without damaging the seed inside).
- A bowl of water (to test seed viability).
- Paper towels (for drying and storing seeds).
- A plastic bag with a zipper (for “stratification”—mimicking winter conditions to wake the seed).
- Potting soil (well-draining, organic mix—5–10 for a bag).
- Small pots (6–8 inches deep, with drainage holes—reuse plastic containers or buy affordable ones for 2–3 each).
- A sunny spot (outdoor or near a window with 6+ hours of direct sunlight).
2. Extract and Test the Peach Seeds (Critical First Step!)
Peach seeds are encased in a hard, woody pit—you need to remove the seed safely and check if it’s viable (able to grow).
Step 1: Crack the Pit
- Let the peach pits dry for 2–3 days on a paper towel (drying makes the pit easier to crack).
- Place the pit on a hard surface (like a cutting board) and gently tap it with a hammer or nutcracker—be careful not to hit too hard! The goal is to split the pit open, not crush the seed inside.
- Once the pit cracks, use your fingers to pry it apart and remove the seed. The seed looks like a small, beige almond with a thin brown coat.
Step 2: Test Seed Viability
- Fill a bowl with water and drop the seeds in. Viable seeds will sink (they’re dense with nutrients). Seeds that float are empty or damaged—discard them.
- Dry the viable seeds with a paper towel (don’t let them sit in water, as this can cause rot).
3. Stratify the Seeds (Mimic Winter to Trigger Growth)
Peach seeds need a period of cold, moist conditions (called “stratification”) to break their dormancy (a state where they stay “asleep” to survive winter). Without stratification, the seed won’t germinate (sprout).
How to Stratify Peach Seeds:
- Moisten a paper towel (not soaking wet—squeeze out excess water so it’s damp).
- Place 2–3 viable seeds on the paper towel, then fold the towel over to cover them.
- Put the wrapped seeds into a zippered plastic bag. Label the bag with the date (stratification takes 8–12 weeks).
- Store the bag in the refrigerator’s crisper drawer (not the freezer!). The temperature should stay between 34–40°F (1–4°C)—this mimics winter soil conditions.
- Check the bag every 2 weeks: If the paper towel dries out, spritz it with water. If you see mold (rare if the towel isn’t too wet), discard the moldy seed and replace the towel.
4. Plant the Germinated Seeds (When They Wake Up!)
After 8–12 weeks of stratification, check the seeds—you’ll see small white roots (called “radicles”) sprouting from the bottom. This means the seed is ready to plant!
Step 1: Prepare the Pots and Soil
- Fill small pots (6–8 inches deep) with well-draining organic potting soil. Peach trees hate “wet feet” (sitting in water), so make sure the pots have drainage holes.
- Water the soil lightly until it’s damp (not soggy)—this helps the seed settle in.
Step 2: Plant the Seed
- Make a small hole in the center of the soil (1–2 inches deep).
- Place the sprouted seed in the hole with the white root pointing downward (this is critical—roots grow down, and the stem will grow up).
- Cover the seed with soil and gently press down to remove air pockets.
- Water the soil again lightly—be careful not to wash away the seed.
Step 3: Care for the Seedling
- Place the pot in a sunny spot with 6+ hours of direct sunlight per day (a south-facing window works well if you’re starting indoors).
- Keep the soil moist but not soggy: Water when the top 1 inch of soil feels dry (stick your finger in to check).
- In 2–3 weeks, you’ll see a green stem and leaves sprout from the soil—congrats, you have a peach seedling!
5. Harden Off and Transplant the Seedling (Move It Outside!)
Once the seedling is 6–8 inches tall (usually after 2–3 months) and the last frost of spring has passed (peach trees are sensitive to cold), it’s time to move it outside. But first, you need to “harden off” the seedling—this helps it adjust to outdoor conditions (wind, temperature changes) without shock.
Step 1: Harden Off the Seedling
- For the first 3 days: Place the pot outside in a shaded, sheltered spot (e.g., under a tree or porch) for 2–3 hours. Bring it back indoors at night.
- For the next 3 days: Increase the outdoor time to 4–6 hours and move it to a spot with partial sunlight (morning sun, afternoon shade).
- For the final 3 days: Leave the seedling outside all day in full sunlight (6+ hours) and bring it in only if temperatures drop below 50°F (10°C).
Step 2: Choose a Planting Spot
- Pick a location in your yard with:
- Full sunlight (8+ hours per day—peach trees need sun to produce fruit).
- Well-draining soil (if your soil is heavy clay, mix in compost or sand to improve drainage).
- Protection from strong winds (wind can damage young trees—plant near a fence or wall for shelter).
Step 3: Transplant the Seedling
- Dig a hole in the ground that’s twice as wide and just as deep as the pot (this gives the roots room to spread).
- Gently remove the seedling from the pot—tap the bottom if it’s stuck, but never pull the stem (you could damage the roots).
- Place the seedling in the hole so the soil level matches the level it was in the pot (don’t plant it too deep or too shallow).
- Fill the hole with soil and press down firmly to remove air pockets.
- Water the tree deeply (1–2 gallons) to help the roots settle.
- Add a 2–3 inch layer of mulch (straw, wood chips, or leaves) around the base of the tree—this retains moisture, suppresses weeds, and keeps the soil cool. Keep the mulch 2 inches away from the trunk to prevent rot.
6. Care for the Young Peach Tree (Help It Grow Strong)
Young peach trees need regular care to develop a strong trunk and branches. Here’s what to do:
a. Watering
- Water deeply once a week (1–2 gallons) during the first year—more often if the weather is hot and dry. After the first year, water only during droughts (peach trees are drought-tolerant once established).
b. Fertilizing
- Wait until the tree is 1 year old to fertilize (young seedlings don’t need fertilizer—too much can burn the roots).
- In early spring (before new growth starts), use a balanced organic fertilizer (e.g., 10-10-10) or compost. Follow the package instructions—too much fertilizer can reduce fruit production.
c. Pruning
- Prune the tree in late winter (before buds open) to shape it and remove dead or diseased branches.
- For the first 2 years: Keep the trunk 2–3 feet tall and leave 3–4 strong branches (called “scaffold branches”) to form the tree’s structure. Cut off any branches that grow below the scaffold branches.
d. Pest and Disease Control
- Peach trees can be affected by pests (aphids, peach tree borers) and diseases (peach leaf curl, brown rot).
- Prevent issues by:
- Keeping the area around the tree clean (remove fallen leaves and fruit).
- Spraying with a organic fungicide (like neem oil) in early spring to prevent peach leaf curl.
- Wrapping the trunk with tree wrap in winter to prevent borers.
7. Wait for Fruit (Patience Is Key!)
Peach trees grown from seed take 3–5 years to produce fruit—this is longer than grafted trees (which produce fruit in 1–2 years), but the wait is worth it! When your tree does bear fruit:
- Harvest peaches when they’re fully ripe (they’ll be soft to the touch, have a sweet smell, and come off the branch easily when twisted).
- Enjoy fresh peaches, or use them in pies, jams, or smoothies—you’ll taste the reward of your hard work!
Final Tips for Success
- Be patient: Growing a tree from seed takes time, but watching it grow year after year is incredibly satisfying.
- Protect from frost: If a late frost is predicted in spring (after buds open), cover the tree with a blanket or tarp overnight to protect the flowers (frost can kill blooms and reduce fruit production).
- Don’t give up: If your first seed doesn’t grow, try again—even experienced gardeners have failed seeds!
Growing a peach tree from seed is a wonderful way to connect with nature and grow your own food. With the right care and a little patience, you’ll soon have a thriving peach tree that provides delicious fruit for years to come. Happy planting!


")

