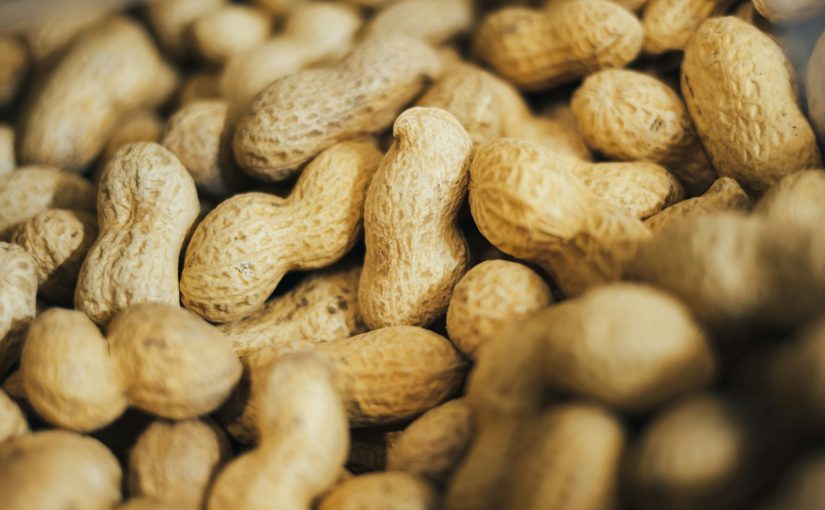
Peanuts (scientific name: Arachis hypogaea) are a fun and rewarding crop to grow at home—they’re not just tasty, but their unique growth habit (peanuts develop underground!) makes them a fascinating project for gardeners of all skill levels. Contrary to popular belief, peanuts aren’t nuts—they’re legumes, related to beans and peas, and they thrive in warm, sunny conditions. Whether you’re planting in a garden bed, raised planter, or even a large container, this step-by-step guide will help you grow healthy peanut plants and harvest your own fresh peanuts.
1. Understand Peanut Growth Basics (Key to Success!)
Before planting, it’s important to know how peanuts grow—their life cycle is a bit different from most vegetables:
- Germination: Peanut seeds (called “kernels”) sprout above ground, growing into leafy, low-growing plants (12–18 inches tall) with yellow flowers.
- Pegging: After flowering (about 4–6 weeks after planting), the plant sends out small, stem-like structures called “pegs” from the base of the flowers. These pegs grow downward, burying themselves 1–2 inches into the soil.
- Pod Development: Each peg swells underground to form a peanut pod, which contains 1–4 kernels (the peanuts we eat).
- Harvest: Pods mature 120–150 days after planting, when the plant’s leaves turn yellow and start to die back.
Peanuts need warm soil (at least 65°F/18°C) and full sunlight (8+ hours per day) to thrive. They also require well-draining soil—waterlogged soil causes pods to rot.
2. Gather Supplies (Simple and Affordable!)
You don’t need specialized equipment to grow peanuts—most items are easy to find at garden centers or even your kitchen:
- Peanut Seeds (Kernels): Choose unsalted, unroasted peanuts (roasted or salted kernels won’t germinate). Look for “seed peanuts” at garden stores (these are tested for viability) or use organic peanuts from the grocery store (avoid those treated with fungicides).
- Soil: Well-draining, loamy soil with a pH of 5.8–6.5. If your soil is heavy clay or sandy, mix in compost (2–3 inches per square foot) to improve texture and fertility.
- Garden Bed/Raised Planter/Container: Peanuts need space to spread—plant them in a bed that’s at least 3 feet wide, or use a container (12+ inches deep and 18+ inches wide) for small spaces.
- Garden Tools: A trowel (for digging planting holes), rake (for smoothing soil), and watering can/hose (with a gentle spray nozzle).
- Mulch: Straw, grass clippings, or shredded leaves (to retain moisture, suppress weeds, and keep soil cool).
3. Choose the Right Time to Plant
Peanuts are warm-season crops—they can’t tolerate frost, so timing is crucial:
- In Zones 8–11 (Mild Climates): Plant in late March to early April, once soil temperatures reach 65°F/18°C.
- In Zones 5–7 (Temperate Climates): Wait until after the last frost date (usually mid-May to early June) to plant. If you want an early start, start seeds indoors 4–6 weeks before the last frost (plant them in peat pots, which can be buried directly in the soil to avoid disturbing roots).
- In Zones 3–4 (Cold Climates): Peanuts have a long growing season (120+ days), so they may not mature before the first fall frost. Consider growing them in containers that you can move indoors if temperatures drop, or choose early-maturing varieties (e.g., ‘Early Spanish’).
4. Step-by-Step Planting Instructions
Step 1: Prepare the Soil
- Clear the planting area of weeds, rocks, and debris.
- Loosen the soil to a depth of 8–10 inches with a garden fork or tiller—this helps pegs bury easily and allows roots to spread.
- Mix in 2–3 inches of compost or well-rotted manure to add nutrients (peanuts don’t need heavy fertilization, but organic matter improves soil health).
- Rake the soil smooth to create a level planting surface.
Step 2: Prepare Peanut Seeds (Optional but Recommended)
- Soak peanut kernels in warm water for 2–4 hours before planting—this softens the seed coat and speeds up germination (skip this step if using pre-treated seed peanuts).
- Do not remove the seed coat (the thin, papery layer around the kernel)—it protects the seed during germination.
Step 3: Plant the Seeds
- Dig holes 1–2 inches deep, spaced 6–8 inches apart. If planting in rows, leave 2–3 feet between rows to give the plants room to spread.
- Place 1–2 peanut kernels in each hole (planting 2 increases your chances of germination; you can thin to one plant per hole later if both sprout).
- Cover the holes with soil and gently press down to remove air pockets.
- Water the area thoroughly but gently—keep the soil moist (not soggy) until seeds germinate (usually 7–10 days).
Step 4: Thin Seedlings (If Needed)
- Once seedlings are 3–4 inches tall, thin them so there’s one plant every 6–8 inches. Pull out the weaker seedling at the base—avoid disturbing the roots of the remaining plant.
5. Care for Peanut Plants (Critical for Pod Production)
a. Watering
- Peanuts need consistent moisture, especially during the first 6 weeks (when roots and leaves are growing) and during pegging (when pods start forming underground).
- Water deeply once a week (1–1.5 inches of water)—use a soaker hose or gentle spray to avoid washing away soil around the plants.
- Reduce watering once pods start to mature (about 2–3 weeks before harvest)—too much water at this stage can cause pods to rot.
- Avoid overhead watering late in the day—wet leaves overnight increase the risk of fungal diseases.
b. Mulching
- Once seedlings are 4–6 inches tall, add a 2–3 inch layer of mulch (straw works best!) around the base of the plants.
- Mulch keeps the soil cool (important for underground pod development), retains moisture, and prevents weeds from competing with the plants.
- Keep mulch 1 inch away from the plant stems to avoid rot.
c. Fertilizing
- Peanuts fix nitrogen in the soil (thanks to bacteria on their roots), so they don’t need nitrogen-rich fertilizer—too much nitrogen will cause lots of leaves but few pods.
- If your soil is poor, apply a balanced, slow-release fertilizer (e.g., 10-10-10) once, 3 weeks after planting—follow the package instructions to avoid over-fertilizing.
- Avoid using high-nitrogen fertilizers (e.g., lawn fertilizers) on peanut plants.
d. Weed Control
- Pull weeds regularly, especially during the first 8 weeks—weeds compete with peanut plants for water, nutrients, and sunlight.
- Be careful when weeding around the plants—peanut roots are shallow, and disturbing them can damage pegs (reducing pod production). Use a hand trowel for small weeds instead of a hoe.
e. Pest and Disease Management
- Common pests: Aphids, cutworms, and armyworms. Control aphids with a strong spray of water or insecticidal soap. Protect young seedlings from cutworms by placing a cardboard collar (2 inches tall) around each plant.
- Common diseases: Leaf spot and root rot. Prevent leaf spot by avoiding overhead watering and spacing plants for good air circulation. Prevent root rot by ensuring soil drains well (add compost if needed) and not overwatering.
6. Harvesting Peanuts (The Fun Part!)
Peanuts are ready to harvest when:
- The plant’s leaves turn yellow and start to wilt (usually 120–150 days after planting).
- The pods have a hard shell and the kernels inside are plump and creamy (not soft or green).
How to Harvest:
- Loosen the soil: Use a garden fork to gently dig around the base of the plant (6–8 inches from the stem) to loosen the soil—be careful not to pierce the pods.
- Pull up the plant: Grasp the main stem near the soil and pull upward—most pods will stay attached to the roots.
- Shake off excess soil: Gently shake the plant to remove loose dirt from the pods.
- Cure the peanuts: Hang the plants upside down in a warm, dry, well-ventilated area (e.g., a shed, porch, or garage) for 2–3 weeks. This dries the pods and kernels, improving flavor and preventing mold.
- Remove pods from the plant: Once cured, pluck the pods from the stems. Discard any pods that are moldy, broken, or empty.
7. Store Harvested Peanuts
- In-shell storage: Keep cured, in-shell peanuts in a cool, dry place (60–70°F/15–21°C) in a breathable container (e.g., a paper bag or mesh sack). They will stay fresh for 3–6 months.
- Shelled peanuts: Remove the kernels from the shells and store them in an airtight container in the refrigerator (for up to 6 months) or freezer (for up to 1 year). Roast shelled peanuts before eating for the best flavor!
8. Pro Tips for Growing Peanuts
- Choose the right variety: For home gardens, try ‘Early Spanish’ (early-maturing, good for small spaces), ‘Virginia’ (large kernels, ideal for roasting), or ‘Valencia’ (sweet, often used for boiling).
- Plant with companions: Peanuts grow well with corn, squash, and sunflowers—these plants don’t compete for nutrients and can help shade the soil. Avoid planting peanuts near potatoes (they can attract the same pests).
- Reuse soil: After harvesting, the soil where peanuts grew will be rich in nitrogen—use it for planting leafy greens (e.g., lettuce, spinach) or other nitrogen-hungry crops next season.
Growing peanut plants is a unique and satisfying experience—watching the pegs bury themselves and knowing your peanuts are developing underground adds a fun twist to gardening. With the right care and timing, you’ll soon be enjoying fresh, homegrown peanuts roasted, boiled, or added to your favorite recipes!


