Pittosporum, with its diverse range of species offering everything from compact shrubs to elegant small trees, is a beloved choice for landscapes worldwide. Valued for its attractive foliage, often fragrant flowers, and versatility in hedges, screens, or specimen plantings, it’s no wonder many gardeners aspire to cultivate it. While buying established plants is convenient, propagating Pittosporum from seed offers a uniquely rewarding experience. It’s an economical way to produce multiple plants, allows for the preservation of specific characteristics, and gives you complete control from the very beginning of a plant’s life. This detailed guide will walk you through each step, transforming a tiny seed into a thriving Pittosporum specimen for your garden, ensuring a successful and fulfilling propagation journey.
Collecting and preparing pittosporum seeds
The journey to growing a beautiful Pittosporum begins with the seed itself, and proper collection and preparation are paramount for success. The ideal time to collect seeds is when the capsules on the parent plant have matured and begun to split open, typically in late autumn or early winter, depending on the species and climate. Look for capsules that have changed color, usually from green to black or brown, indicating ripeness. Once collected, the seeds are often encased in a sticky, resinous pulp. This pulp contains germination inhibitors and can also encourage fungal growth, so it’s crucial to remove it.
To clean the seeds, gently crush the capsules to release the seeds and their sticky coating. Place them in a sieve and wash them thoroughly under running water, using your fingers or a soft brush to scrub away the pulp. Some gardeners find it helpful to soak the seeds in warm water for 24 hours prior to washing, as this can soften the pulp, making it easier to remove. After cleaning, spread the seeds out on a paper towel or screen in a warm, well-ventilated area to air dry completely. This prevents mold and ensures they are ready for storage or stratification. For many Pittosporum species, a period of cold stratification can significantly improve germination rates by mimicking winter conditions. Place the cleaned, dry seeds in a sealed plastic bag with a small amount of moist sand or peat moss, and refrigerate them at 2-5°C (35-41°F) for 4-8 weeks before sowing.
Sowing your pittosporum seeds
With your seeds properly prepared and, if necessary, stratified, the next exciting step is sowing them. The timing for sowing is crucial, with early spring being generally ideal, once the risk of severe frost has passed and temperatures begin to rise consistently. This allows the young seedlings to establish themselves during the favorable growing season.
Select shallow seed trays or individual pots that have excellent drainage holes. A high-quality, sterile seed-raising mix is essential. This specialized mix is typically lighter than general potting soil, offering better drainage and aeration, which are vital for delicate seedlings, and is free from weed seeds and pathogens. Moisten the seed-raising mix thoroughly before filling your trays or pots, ensuring it is damp but not waterlogged. Gently press the surface to create a firm, level bed.
Distribute the Pittosporum seeds evenly across the surface of the moistened mix. For optimal spacing, aim for about 2-3 cm (1 inch) between seeds, which allows for better air circulation and reduces competition once they germinate. Lightly cover the seeds with a very thin layer (2-3 mm or about 1/8 inch) of the same seed-raising mix or fine vermiculite. Avoid burying them too deeply, as many Pittosporum species require some light for germination. After sowing, mist the surface gently with water to settle the covering material without disturbing the seeds. Place the trays in a warm location, ideally maintaining a consistent temperature between 18-24°C (65-75°F). Bright, indirect light is best; direct, scorching sun can dry out the delicate seeds and mix too quickly. Keep the soil consistently moist using a fine mist spray, being careful not to overwater. Germination can vary widely depending on the species and seed freshness, often taking anywhere from two weeks to several months. Patience is key during this phase.
Nurturing young seedlings and initial transplanting
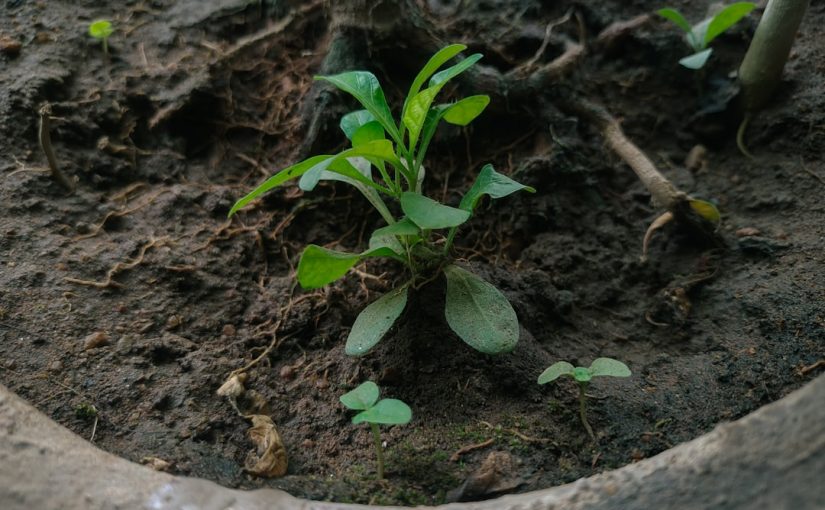
Once your Pittosporum seeds have germinated and the first delicate sprouts emerge, the focus shifts to providing optimal conditions for their continued growth. This stage is critical for developing strong, healthy plants. As seedlings appear, ensure they receive ample bright, indirect light. If natural light is insufficient, consider using grow lights, positioning them a few inches above the seedlings for 12-16 hours a day. Maintain consistent moisture in the soil, but be extremely cautious not to overwater, which can lead to damping-off disease—a common fungal issue that causes young seedlings to collapse. Good air circulation is also vital; a small fan set on a low setting can help strengthen stems and prevent fungal problems.
Wait until the seedlings have developed at least two sets of “true leaves” (the leaves that appear after the initial cotyledons) before considering transplanting. The cotyledons are the embryonic leaves, while the true leaves resemble miniature versions of the mature plant’s foliage. At this point, the seedlings are robust enough to handle the stress of being moved. This process, known as “pricking out,” involves carefully lifting each seedling from the seed tray. Handle them by their leaves, not their delicate stems, to avoid damage. Gently separate them and plant each into its own small pot (around 7-10 cm or 3-4 inches in diameter) filled with a good quality, well-draining potting mix. A general-purpose potting mix with added perlite or compost for improved drainage works well. Water thoroughly after transplanting to settle the soil around the roots. Begin a light feeding regimen with a highly diluted liquid fertilizer (e.g., half-strength all-purpose plant food) every two weeks to support their rapid growth.
From pot to garden: establishing your pittosporum
After your Pittosporum seedlings have grown into robust young plants in their individual pots, they will eventually be ready for their permanent home in the garden. This transition, if handled correctly, ensures their continued health and vigorous development. The timing for planting out is generally when the plants are well-rooted in their pots, typically 20-30 cm (8-12 inches) tall, and all danger of frost has passed in your region. Before planting directly into the garden, it’s essential to “harden off” your young Pittosporum. This process gradually acclimates them to outdoor conditions, preparing them for the harsher elements of sun, wind, and fluctuating temperatures. Over a period of 7-10 days, progressively expose the plants to outdoor conditions, starting with a few hours in a sheltered, shady spot and gradually increasing their time outside and exposure to sun.
Choosing the right site in your garden is paramount for Pittosporum. Most species thrive in full sun to partial shade, with well-draining soil. Pittosporum tolerates a range of soil types but prefers slightly acidic to neutral pH. Dig a hole twice as wide as the root ball and just as deep. Gently remove the plant from its pot, being careful not to disturb the roots excessively. Place it in the center of the hole, ensuring the top of the root ball is level with the surrounding soil. Backfill with the excavated soil, mixed with some compost to enrich it, and firm gently around the base of the plant. Water thoroughly immediately after planting to eliminate air pockets and help settle the soil. For the first few weeks, maintain consistent moisture, especially during dry spells, to help the plant establish. Once established, Pittosporum is relatively drought-tolerant but will benefit from regular watering during prolonged dry periods. Apply a balanced, slow-release granular fertilizer in spring, and prune annually to maintain shape and encourage dense growth.
| Growth Stage | Key Action | Optimal Condition |
|---|---|---|
| Seed Preparation | Clean pulp, cold stratify (if needed) | 2-5°C (35-41°F) for 4-8 weeks |
| Sowing | Plant in sterile seed mix | 18-24°C (65-75°F), bright indirect light |
| Seedling Care | Consistent moisture, good air circulation | Develop 2 sets of true leaves |
| Transplanting | Move to individual pots | Well-draining potting mix |
| Hardening Off | Gradual outdoor exposure | 7-10 days duration |
| Garden Planting | Plant in prepared site | Full sun to partial shade, well-draining soil |
Final thoughts on cultivating pittosporum from seed
Embarking on the journey of growing Pittosporum from seed is a deeply rewarding endeavor, transforming tiny specks into magnificent garden specimens. We’ve covered every critical stage, from the meticulous collection and preparation of seeds to their careful sowing in optimal conditions. We then delved into the crucial period of nurturing delicate seedlings, guiding them through their first true leaves and into individual pots, setting the stage for robust growth. Finally, the process of hardening off and planting these young plants into their permanent garden homes was detailed, ensuring a smooth transition and long-term establishment. Each step, though requiring patience and attention, contributes to the overall success and health of your Pittosporum plants.
By following these guidelines, you’re not just growing plants; you’re cultivating a deeper connection with nature and enjoying the immense satisfaction that comes from creating life from scratch. The effort invested in growing Pittosporum from seed not only yields beautiful, resilient plants but also offers an economical way to expand your garden’s beauty or create living privacy screens. Whether you’re an experienced gardener or a curious beginner, the process of bringing Pittosporum to life from a tiny seed is a testament to the wonders of horticulture. May your garden thrive with the lush foliage and elegant form of your home-grown Pittosporum.
Image by: Nikhil Ekka


